
A damaged roof vent cap can lead to water damage, pest infestations, and poor ventilation in your home. When you notice cracks, rust, or missing pieces, it’s time to take action before small problems become costly repairs.
Whether you’re dealing with a broken plastic cap or a rusted metal one, replacing it yourself can save money and protect your home from the elements. Our team at Best Exteriors has helped countless Columbus homeowners tackle this common roofing issue with confidence.
This guide covers everything you need to know about replacing your roof vent cap safely and effectively, including:
- Why roof vent cap maintenance is crucial
- Step-by-step replacement process
- Essential tools and materials
- Safety considerations and professional advice
- Tips for choosing the right replacement cap
🏠 Why Roof Vent Cap Replacement Is Important
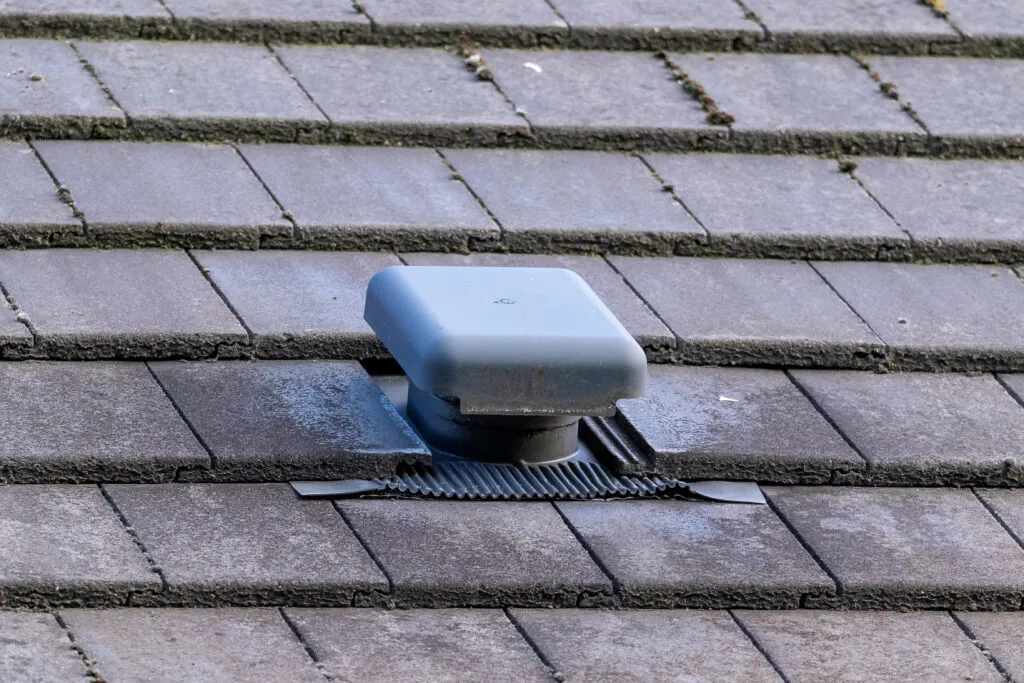
Your roof vent cap acts as a barrier against weather, animals, and debris. When this small but essential component fails, it can lead to major problems in your home.
A functioning roof vent cap protects your home by:
- Preventing water damage: Stops rain and snow from entering your attic and damaging your roof.
- Blocking pests: Keeps birds, squirrels, and insects from nesting in your vents.
- Maintaining proper airflow: Ensures efficient ventilation and temperature regulation.
- Protecting against debris: Prevents leaves and branches from clogging vents.
- Saving energy costs: Supports energy-efficient heating and cooling.
- Preventing mold growth: Reduces moisture buildup that leads to mold or mildew.
🔧 7 Steps to Replace Your Roof Vent Cap
Replacing a roof vent cap is a manageable DIY project if you have basic tools and safety knowledge. Follow these steps to ensure a proper installation.
1. Gather Your Tools and Materials
- Measure your vent cap: Use a tape measure to ensure you buy the correct size.
- Select the right cap: Match it to your roof type and local weather conditions.
- Prepare your tools: You’ll need a screwdriver, pry bar, caulk gun, ladder, gloves, and weatherproof caulk.
2. Choose the Right Weather Conditions
- Pick a dry day: Avoid rain, strong winds, or slippery conditions.
- Work in daylight: Adequate lighting ensures a safer and cleaner job.
3. Set Up Safety Equipment
- Use a stable ladder: Place it on flat ground and have someone hold it.
- Wear non-slip shoes and gloves: Prevent slips and protect your hands.
- Use a harness if needed: Especially for steep or high roofs.
4. Remove the Old Vent Cap
- Inspect how it’s attached: Note screws, nails, or caulk points.
- Remove fasteners: Use a screwdriver or pry bar carefully.
- Clean the opening: Remove old caulk and debris for a smooth surface.
5. Inspect the Vent Opening
- Check for damage: Look for rust, cracks, or weak spots.
- Repair as needed: Patch holes and ensure a solid base.
- Clear airflow: Remove obstructions like dirt or nests.
6. Install the New Vent Cap
- Position and align: Fit the new cap securely over the opening.
- Attach with fasteners: Follow manufacturer’s instructions for screws or nails.
- Seal with caulk: Apply weatherproof caulk evenly around the edges.
7. Test and Inspect
- Check stability: Ensure the cap is tight and won’t shift.
- Verify airflow: Confirm air passes freely through the vent.
- Inspect caulk: Look for gaps or leaks and clean up the area.
By following these steps, you’ll ensure your new roof vent cap is installed securely and ready to protect your home.
⚠️ Safety Considerations and Professional Help
While replacing a roof vent cap can be done on your own, some situations require professional help for safety and quality assurance.
When to Call a Professional
- Steep or tall roofs: Professionals have safety gear for high or angled surfaces.
- Structural damage: If you find rot or serious issues, get a professional inspection.
- Multiple repairs: For several damaged caps or complex roof issues, expert service ensures long-term reliability.
Safety Equipment Essentials
- Ladder safety: Extend your ladder three feet above the roof line and never work alone.
- Protective gear: Wear non-slip shoes, gloves, glasses, and use a safety harness if necessary.
Weather Awareness
- Wind: Avoid working in winds over 15 mph.
- Temperature: Extreme heat or cold can affect both materials and safety.
💡 Take Action to Protect Your Home
Replacing your roof vent cap is a simple yet valuable maintenance task that prevents water damage, improves ventilation, and keeps pests out. Regular inspections and timely replacements will extend your roof’s lifespan and maintain your home’s comfort.
If you’re not comfortable doing it yourself or discover additional roofing concerns, contact Best Exteriors for professional help. Our Columbus roofing experts provide reliable installation, repair, and maintenance services to keep your home safe and protected year-round.